
New products

.jpg?max-width=128&max-height=128&quality=85)
.jpg?max-width=128&max-height=128&quality=85)
.jpg?max-width=128&max-height=128&quality=85)
.jpg?max-width=128&max-height=128&quality=85)
.jpg?max-width=128&max-height=128&quality=85)
.jpg?max-width=128&max-height=128&quality=85)
.jpg?max-width=128&max-height=128&quality=85)
Carburettors

How to Tune (a New) Carburetor
Weber carburetors, in particular, are highly responsive to fine adjustments. This also means they can seem somewhat complicated if you're unfamiliar with how they work. The first step should always be to adjust the float level, even on a brand-new carburetor. After that, everything comes down to having the correct jetting.
Some complete carburetor kits are already jetted for a specific engine combination, while others come with a basic setup or standard jets.
A good tip is to inspect your carburetor and make a note of all the installed jet sizes for future tuning. Car clubs, online forums, and experienced enthusiasts are often the best sources of information when determining the ideal jetting for your particular setup.
Keep in mind that every other engine specification also affects the required jetting, including engine displacement, camshaft, exhaust system, ignition system, and more. Because of this, the carburetor itself is rarely the cause when problems occur. Always check the ignition system first!
Although Weber carburetors differ slightly from model to model, they all follow the same basic operating principles. For that reason, it's always worth learning about carburetors in general—or even better, your specific Weber model.
Some of the basic principles of a properly tuned carburetor are:
- Adjust the float level.
- Ensure the carburetor receives sufficient fuel at the correct fuel pressure.
- Check the ignition system and eliminate any vacuum leaks.
- If you're running multiple carburetors, synchronize them using a carb synchronizer (vacuum gauge).
- Fine-tune the jetting.
- Finally, adjust the air/fuel mixture and idle speed.
Many adjustments can be performed yourself, but nothing replaces having the engine professionally tuned on a dynamometer. The challenge, at least in Finland, is finding a workshop that has experience with carburetors, keeps a selection of jets in stock, and also has a dyno available.
Since a carburetor operates entirely by mixing fuel and air, accurate tuning also requires a wideband oxygen sensor or an air/fuel ratio (AFR) gauge. However, most adjustments can still be carried out at home. Read up on the necessary procedures, make one change at a time, write down every adjustment, and test-drive the vehicle at both low and high RPM to determine the settings that work best for your specific engine and carburetor combination.
Carburetor Flooding or Fuel Overflow
Weber carburetors are reliable units that offer excellent tuning potential. If something isn't working correctly, the carburetor itself is usually not the problem. In most cases, the issue is caused by something else.
If the carburetor is flooding—or even visibly leaking fuel—there are three things you should always check first:
- Fuel pressure (0.15–0.20 bar / approximately 2–3 psi)
- Needle valve and seat (clean and free from wear)
- Float level (adjusted according to the manufacturer's specifications)

1. Fuel Pressure
Weber (and Dellorto) carburetors are not designed to handle high fuel pressure. Excessive pressure forces fuel past the needle valve, causing the carburetor to flood. When converting to an electric fuel pump, the fuel pressure is often too high. This means that any fuel pump producing excessive pressure must be regulated.
Make sure you use a suitable low-pressure fuel pump. We recommend the WFP502, which is available from us.
Always verify the fuel pressure with a reliable pressure gauge. Our WFR150 glycerin-filled pressure gauge provides accurate readings even at very low pressures. As mentioned earlier, fuel pressure should be 0.15–0.20 bar (approximately 2–3 psi).
Regardless of which fuel pump you use, having the ability to adjust the fuel pressure is always an advantage. We also offer Malpassi fuel pressure regulators, available with the option of an integrated fuel filter.
2. Needle Valve and Seat
A worn needle valve can allow fuel to pass even after the float bowl has reached the correct fuel level. Inspect the needle valve and seat to ensure they are in good condition, close properly, and are free from dirt or deposits.
It's also a good idea to inspect the rest of the carburetor at the same time. Even the smallest particle of dirt can affect the air/fuel mixture or prevent the carburetor from functioning correctly.
We recommend purchasing a service kit for your specific carburetor model to ensure all wear components are replaced. These are also available from us. If the carburetor is heavily worn, replacing it with a brand-new unit is often the best solution.
3. Float Height
One of the most commonly overlooked causes of carburetor problems is the float height. Both the closed and open float settings must be adjusted according to the manufacturer's specifications.
The carburetor's entire operation depends on maintaining the correct fuel level in the float bowl before the fuel is distributed throughout the carburetor. A float adjusted too high or too low will cause drivability problems.
Also check that the float is not bent or twisted. If necessary, carefully straighten it. Always refer to the manufacturer's specifications for the correct float height.
Note: The float height should always be checked and adjusted—even on a brand-new carburetor.
Based on our experience, it's worth comparing float height specifications from multiple sources, as they don't always agree. This often depends on whether the float is made of plastic composite or brass.
While adjusting the float, also check that it isn't leaking. Remove the float and submerge it in water. If you see air bubbles escaping, the float has a leak. A brass float can often be soldered, while a plastic float is usually replaced.
Adjusting the Idle Mixture and Idle Speed (Example: Weber DGAV / DGAS)
Poor idle quality is often caused by an incorrectly adjusted or overly tight throttle linkage. If you can't get the engine to idle properly using the following adjustment procedure, you may need to try different carburetor jetting.
Also remember that every other part of the engine must be functioning correctly before attempting to fine-tune the idle. All adjustments should be carried out with the choke fully disengaged, or after the engine has reached normal operating temperature.
IF YOU ARE RUNNING MULTIPLE CARBURETORS, MAKE SURE THEY ARE PROPERLY SYNCHRONIZED BEFORE ADJUSTING THE IDLE MIXTURE.
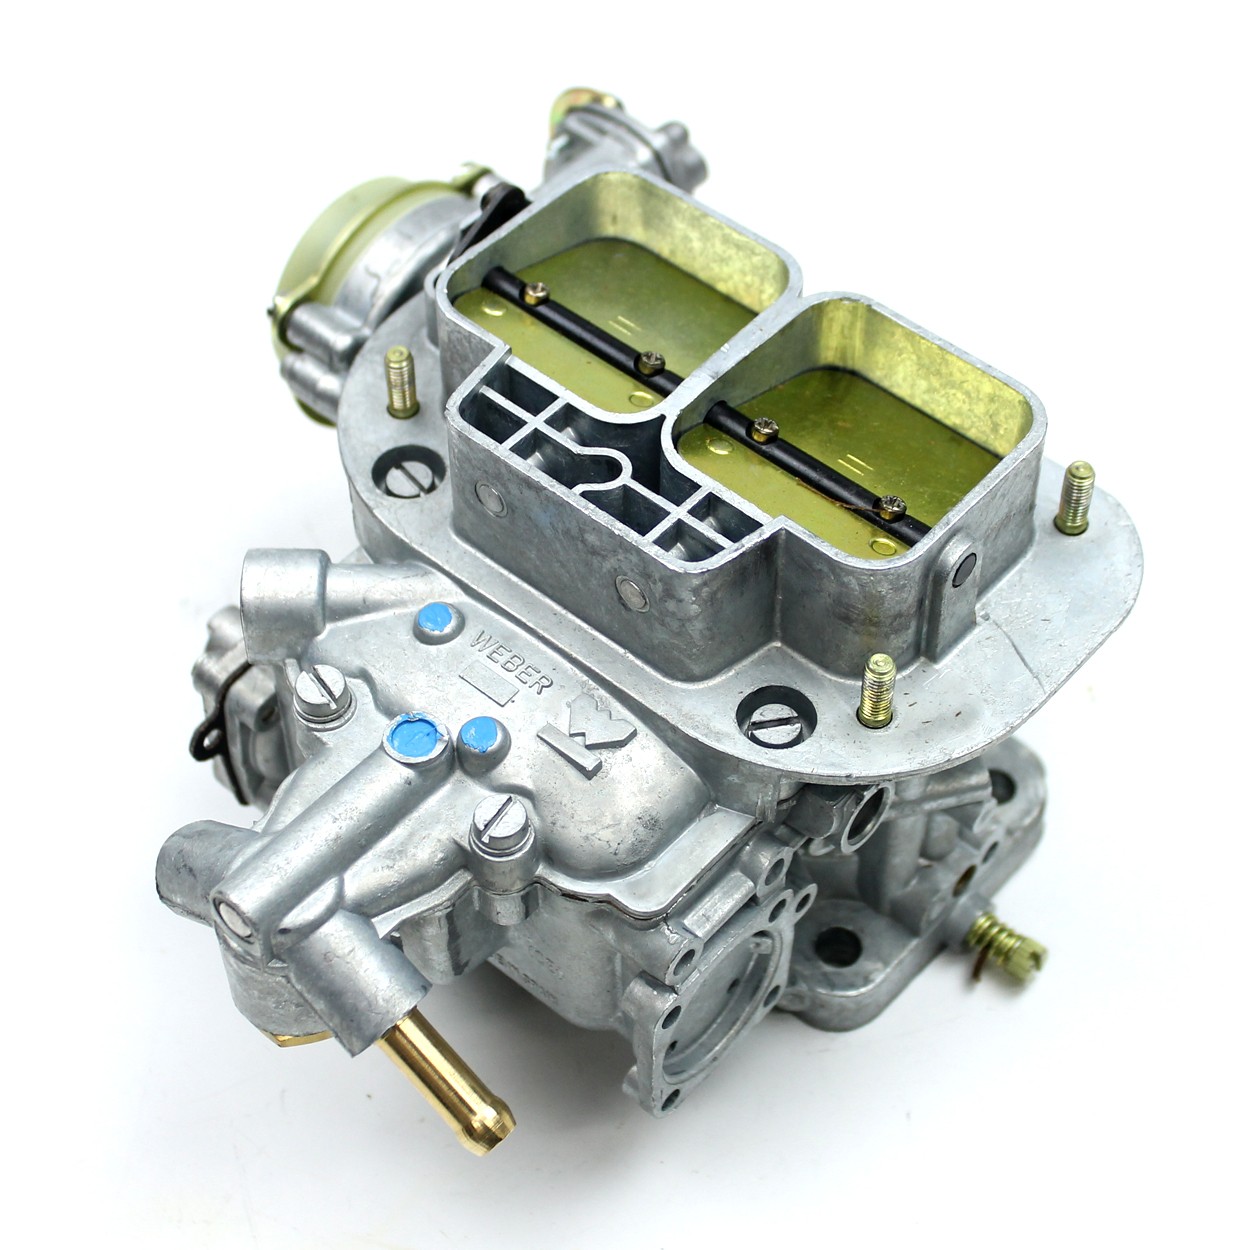
Adjusting the Idle Mixture and Idle Speed
- Disconnect the choke, or allow the engine to warm up to normal operating temperature.
- Back off the throttle stop screw until it no longer touches the throttle linkage.
- Gently turn the idle mixture screw in until it lightly seats. Do not overtighten!
- Back the idle mixture screw out 2 full turns.
- Start the engine and adjust the mixture screw in ¼ or ½ turn increments.
- Your goal is to find the position where the engine runs at its smoothest.
- Once the engine starts to run worse again, turn the screw back to the position where it ran best.
- Set the correct idle speed and lock the throttle stop screw in place.
If the idle mixture screw ends up being more than 2½ turns out from its seated position, the idle jet is generally too small. If it is less than 1½ turns out, the idle jet is generally too large.
Synchronizing Multiple Carburetors (Example: 3 × Weber DCNF)
In addition to tuning a single carburetor, many engine setups use multiple carburetors. This is where things start to get really interesting!
As with any carburetor adjustment, make sure everything else is functioning correctly before you begin. This includes checking the ignition system (spark plugs, ignition leads, distributor cap, rotor, etc.), the fuel system (fresh fuel, a clean fuel filter, properly functioning throttle linkage, correctly adjusted float levels, and IDENTICAL JETS IN ALL CARBURETORS!). Also verify that the engine has good compression.
The following tools are invaluable for this adjustment:
- A short flat-blade screwdriver (mark one side with a permanent marker so you can easily keep track of exactly how many turns you make in either direction).
- A carburetor synchronizer (synchrometer) or vacuum gauge.
- 8 mm and 10 mm combination wrenches.
The idle jets control the engine's fuel delivery up to approximately 3,000 RPM.
Note: The idle mixture screws affect idle only.
A properly synchronized carburetor setup should have only one—or ideally none—of the air bypass screws open.
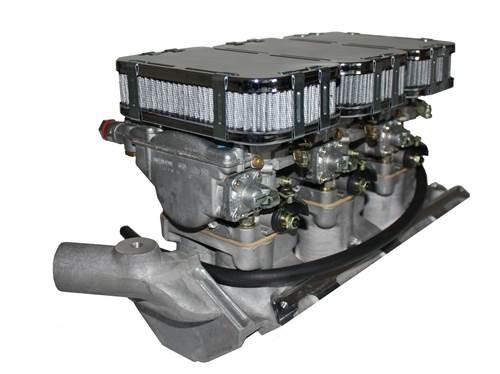
-
Base settings. Close all air bypass screws. Turn each idle mixture screw out 2 full turns from the fully seated position. Turn the idle speed screws in one full turn from the point where they first make contact with the throttle linkage. A piece of paper placed between the screw and the linkage can help you determine exactly when contact is made.
-
Warm the engine up to normal operating temperature and adjust the idle speed. On multiple-carburetor setups, this is easiest by adjusting one carburetor at a time while bringing the others into balance. Aim for an idle speed of approximately 900–1,000 RPM.
-
Using your carburetor synchronizer (synchrometer) or vacuum gauge, record the highest reading for each individual carburetor. In other words, don't compare the highest readings overall—record the highest reading from either barrel of each carburetor.
-
The goal is to adjust each carburetor's idle speed using the throttle linkage (or the adjustment on the first carburetor, depending on your linkage setup) until each carburetor has at least one barrel showing the same reading. The actual number is not important—what matters is that all carburetors share the same reference value.
-
Next, measure both barrels of every carburetor and use the air bypass screws to bring the lower readings up to match the higher ones. Your goal is to achieve the same airflow reading in every barrel (for example, all six barrels on a 3 × DCNF setup). In practice, obtaining perfectly identical readings may not always be possible, so adjust them as closely as you can.
-
Your carburetors are now synchronized. DON'T FORGET TO READJUST THE THROTTLE LINKAGE STOPS! Once this is done, you can continue adjusting the idle speed and other settings knowing that your carburetors are properly synchronized.
Thomas Kula
Retrospeed
info@retrospeed.fi